Data … as usual

All things about data by Laurent Leturgez

Category Archives: VirtualBox

Enable SIMD SSE4 extension in Oracle VirtualBox

If like me you are using Virtualbox for your Oracle labs, maybe you have seen than SSE extensions are activated, but neither SSE4 (1 and 2) nor AVX extensions are activated in your VMs. But you have a modern CPU in your laptop and you cannot use these extensions in your VM (specially Oracle 12c with in Memory option) :

[oracle@oel64-112 ~]$ grep flags /proc/cpuinfo | uniq
flags : fpu vme de pse tsc msr pae mce cx8 apic sep mtrr pge mca cmov pat pse36 clflush mmx fxsr sse sse2 ht syscall nx rdtscp lm constant_tsc rep_good nopl pni ssse lahf_lm

Only SSE, SSE2, and SSSE3 are active and this can be seen in details in your Oracle utilization:


SQL> select display_name,value from v$mystat ms, v$statname n where ms.statistic#=n.statistic#
 2 and display_name in ('IM scan CUs columns accessed',
 3 'IM scan segments minmax eligible',
 4 'IM scan CUs pruned');

DISPLAY_NAME                                                          VALUE
---------------------------------------------------------------- ----------
IM scan CUs columns accessed                                              0
IM scan CUs pruned                                                        0
IM scan segments minmax eligible                                          0

SQL> select count(*) from s where amount_sold>1700;

COUNT(*)
----------
 2095

SQL> select display_name,value from v$mystat ms, v$statname n where ms.statistic#=n.statistic#
 2 and display_name in ('IM scan CUs columns accessed',
 3 'IM scan segments minmax eligible',
 4 'IM scan CUs pruned');

DISPLAY_NAME                                                          VALUE
---------------------------------------------------------------- ----------
IM scan CUs columns accessed                                              4
IM scan CUs pruned                                                        5
IM scan segments minmax eligible                                          9

SQL> select spid from v$process where addr=(select paddr from v$session where sid=sys_context('USERENV','SID'));

SPID
------------------------
23693


[oracle@oel64-112 ~]$ pmap -x 23693 | awk {'print $6;'} | grep lib | uniq
libpthread-2.12.so
libaio.so.1.0.1
libc-2.12.so
libm-2.12.so
libnuma.so.1
libnsl-2.12.so
librt-2.12.so
libnque12.so
libnss_files-2.12.so
libdl-2.12.so
libons.so
libocrutl12.so
libocrb12.so
libocr12.so
libskgxn2.so
libhasgen12.so
libdbcfg12.so
libclsra12.so
libipc1.so
libmql1.so
libskjcx12.so
libskgxp12.so
libcell12.so
libodmd12.so

Our server process doesn’t use libshpksse4212.so nor  libshpkavx12.so librairies. (nevertheless, SIMD extensions are used because we can see IM CU pruning). More details about this here: http://blog.tanelpoder.com/2014/10/05/oracle-in-memory-column-store-internals-part-1-which-simd-extensions-are-getting-used/ 

This is because Oracle VirtualBox doesn’t support officially  SSE4_1, SSE4_2, and AVX extension.

But if you read VirtualBox User Manual, we can see that, Starting with VirtualBox 4.3.8, SSE4 extensions can be activated on you VM guests. (This is experimental).

To do this, you have to execute those commands with VirtualBox CLI :


$ VBoxManage setextradata "OEL6.4 Oracle DB (192.168.99.8)" VBoxInternal/CPUM/SSE4.1 1

$ VBoxManage setextradata "OEL6.4 Oracle DB (192.168.99.8)" VBoxInternal/CPUM/SSE4.2 1

$ VBoxManage getextradata "OEL6.4 Oracle DB (192.168.99.8)" enumerate
Key: GUI/LastCloseAction, Value: PowerOffRestoringSnapshot
Key: GUI/LastGuestSizeHint, Value: 720,400
Key: GUI/LastNormalWindowPosition, Value: 10,31,720,442
Key: GUI/MiniToolBarAlignment, Value: bottom
Key: GUI/SaveMountedAtRuntime, Value: yes
Key: GUI/ShowMiniToolBar, Value: yes
Key: VBoxInternal/CPUM/SSE4.1, Value: 1
Key: VBoxInternal/CPUM/SSE4.2, Value: 1

Note: If you want to get the list of your VM, you can use this command: VBoxManage list vms

Now start your VM, and let’s check:


[oracle@oel64-112 ~]$ grep flags /proc/cpuinfo | uniq
flags : fpu vme de pse tsc msr pae mce cx8 apic sep mtrr pge mca cmov pat pse36 clflush mmx fxsr sse sse2 ht syscall nx rdtscp lm constant_tsc rep_good nopl pni ssse3 sse4_1 sse4_2 lahf_lm

and now on the oracle server process side:


$ sqlplus / as sysdba

SQL*Plus: Release 12.1.0.2.0 Production on Tue Apr 14 11:13:40 2015

Copyright (c) 1982, 2014, Oracle. All rights reserved.

Connected to:
Oracle Database 12c Enterprise Edition Release 12.1.0.2.0 - 64bit Production
With the Partitioning, OLAP, Advanced Analytics and Real Application Testing options

SQL> select spid from v$process where addr=(select paddr from v$session where sid=sys_context('USERENV','SID'));

SPID
------------------------
3363


$ pmap -x 3363 | awk {'print $6;'} | grep lib | uniq
libpthread-2.12.so
libaio.so.1.0.1
libc-2.12.so
libm-2.12.so
libnuma.so.1
libnsl-2.12.so
librt-2.12.so
>>>>>  libshpksse4212.so <<<<<
libnque12.so
libnss_files-2.12.so
libdl-2.12.so
libons.so
libocrutl12.so
libocrb12.so
libocr12.so
libskgxn2.so
libhasgen12.so
libdbcfg12.so
libclsra12.so
libipc1.so
libmql1.so
libskjcx12.so
libskgxp12.so
libcell12.so
libodmd12.so

Ok, our database server is now using SSE4 SIMD extensions, but what about AVX ?

AVX extensions are not yet supported on VirtualBox at the moment, and it’s not announced to be (even in experimental mode) with VirtualBox 5.

So for the moment, if you want to use AVX extensions in your guests VM, you need to use VMWare Fusion or parallels (for Mac OS Users) but they are not free tools. (I didn’t search any hypervisor  on Windows or Linux that supports AVX extensions), if you know one … let me know.


Advertisement

Step by step Solaris 11.1 installation guide on a virtual box VM (x86-64)

Solaris is an OS with many tools like dtrace. In my case, I installed it because I would like to test Oracle 12c and solaris specific views that detect long IO operation: V$KERNEL_IO_OUTLIER.

First of all, you need to download the installation medium which is available at https://edelivery.oracle.com. You need to download the Interactive text install medium :

S11_00

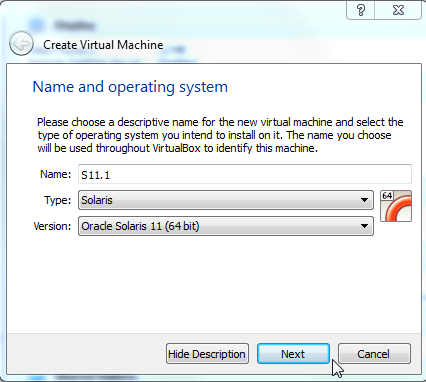
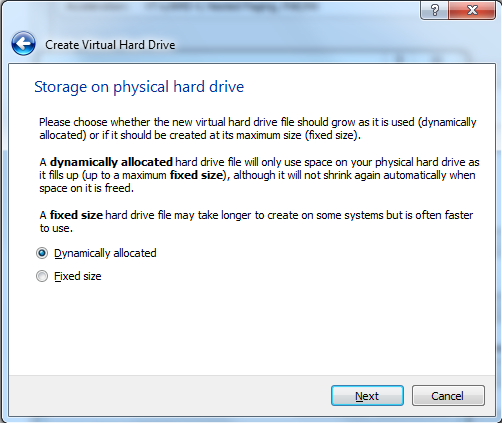
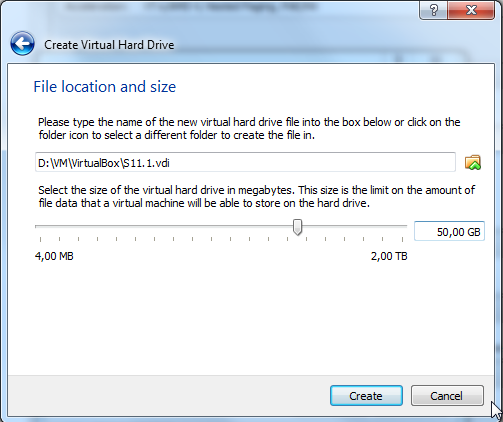
Next, you have to create a new VM. This can be done by following steps below:

S11_01

S11_02

S11_03

S11_04

S11_05

S11_06

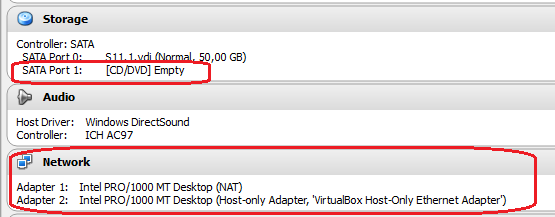
Ok, the VM is created, now let’s configure it by attaching the S11.1 installation media, and adding a network adapter (I will add a another NIC later for my LAN access) :
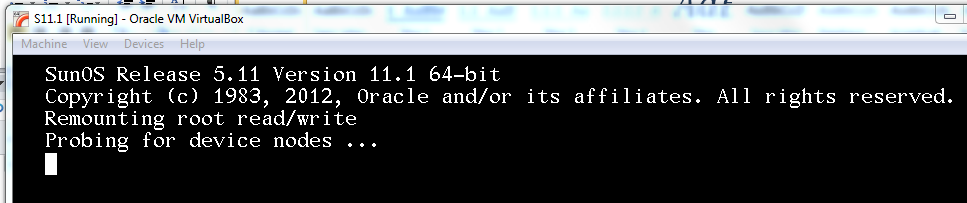
S11_07

And boot the VM …

After booting the VM, the installation process will prompt you for many information (keyboard, hostname etc.):

S11_08

S11_09

Select your keyboard layout

S11_10

And the language for your installation.

S11_11

Select 1 to install Oracle Solaris

S11_12

During the installation process, you can go to the next step by pressing F2 and go back by pressing F3. Everything you can do is mentioned on the bottom of the screen :

S11_13

S11_14

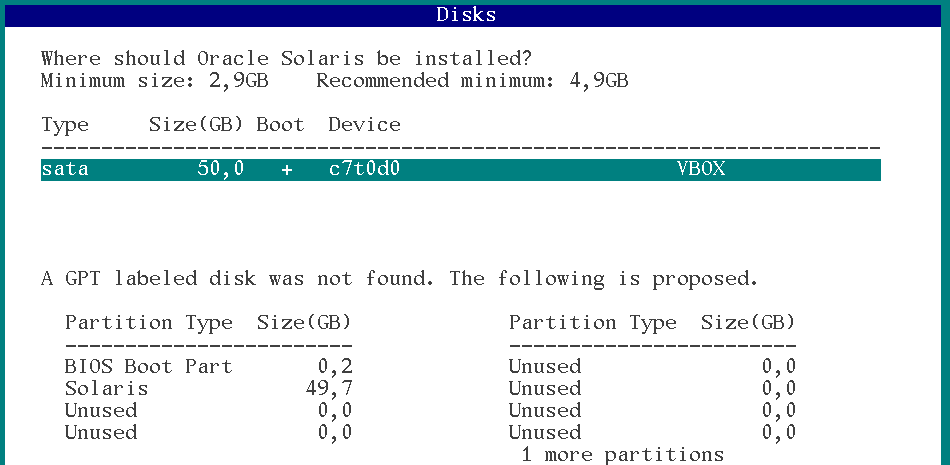
In the next screen, I will use the local discovery method because my disk is locally attached.

S11_15

Select the discovered disk where you want to install S11 and then press F2.

S11_16

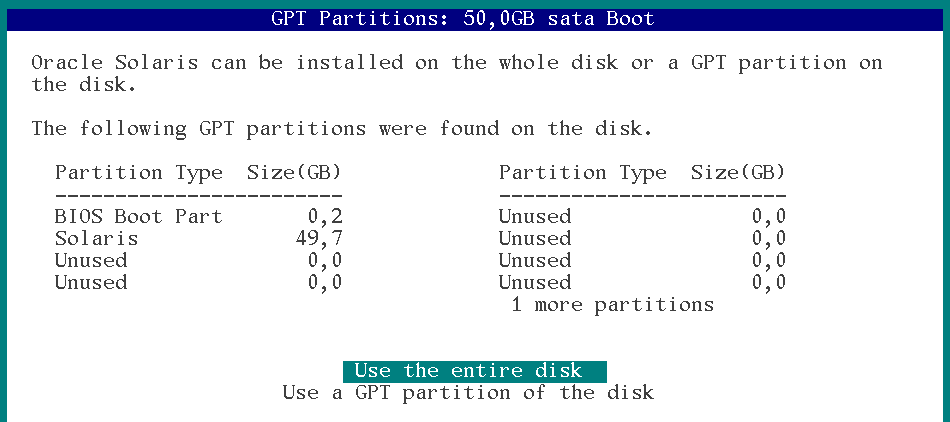
In this screen, I choose to use the entire disk for my installation. You can select another partition by selecting “Use a GPT partition of the disk”.

S11_17

Enter the computer name (short name), and choose how you want to configure your network. I decided to configure my network automatically (DHCP).

S11_18

No alternative naming service.

S11_19

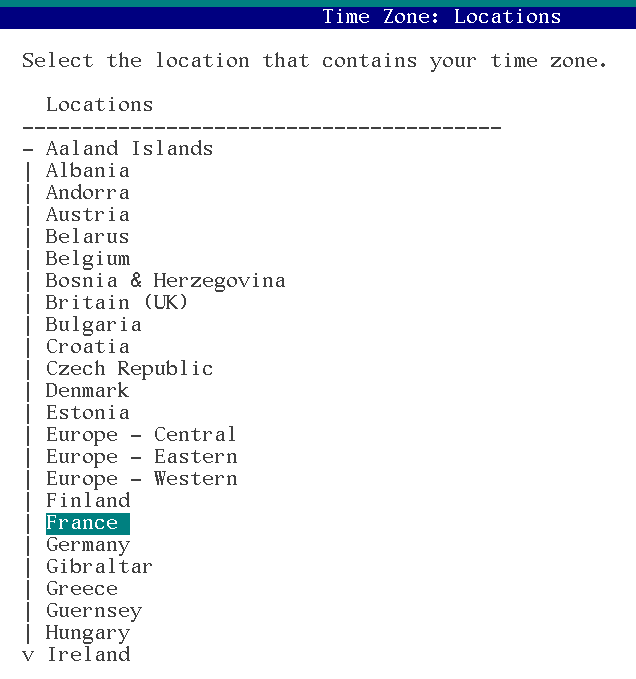
Ok, now it’s time to configure time related information, first of all … Time zone

S11_20

S11_21

Ok timezone set.

S11_22

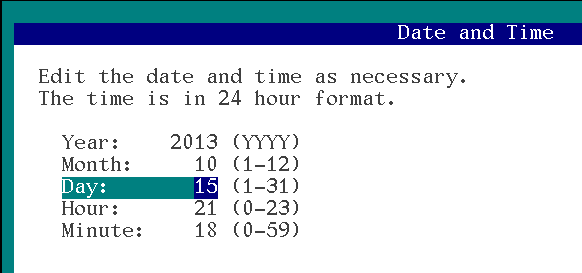
next, set date and time.

S11_23

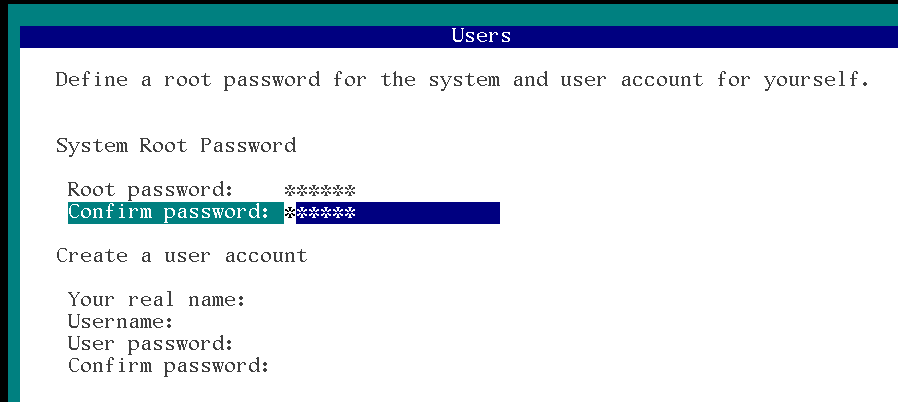
Set the root password and eventually, create a user account.

S11_24

No need to register your system … it’s a VM

S11_25

Next screen is to configure the method to access oracle servers for OCM and Automatic SR features. Here it doesn’t make sense.

S11_26

Review your configuration and press F2 to install.

S11_27

Install in progress …

At the end of the process, you have to reboot your VM by pressing F8. In my case, instead of rebooting the server, I shut it down and took the time to detach the installation medium and to configure another Network adapter plugged into my LAN.

S11_28

Now I can boot my VM … I’m ready to configure it.

To configure network, I used the same method I described in this blog post : https://laurent-leturgez.com/2012/08/01/build-a-basic-network-configuration-on-solaris-11/

S11_29

Net1/v4 has to be configured S11_30

Link is up,so we can configure this NIC.

S11_31

S11_32

As we configured DHCP client on a NAT Virtualbox NIC, we retrieved DNS information:

S11_33

Now I can access to my VM from a putty client. But root access is disabled by default in sshd config. So you have to modify the sshd config  and restart the daemon

S11_34

Next thing I recommend to configure is the package repository. By default, if you have an internet access configured to your machine (which is my case because of my NATted network adapter), you don’t have to configure anything because your default repository is already configured to access Oracle remote repository.

root@S11:~# pkg publisher
PUBLISHER                   TYPE     STATUS P LOCATION
solaris                     origin   online F http://pkg.oracle.com/solaris/release/

root@S11:~# pkg publisher solaris

            Publisher: solaris
                Alias:
           Origin URI: http://pkg.oracle.com/solaris/release/
              SSL Key: None
             SSL Cert: None
          Client UUID: ddee2130-0292-11e2-b9e5-80144f013e20
      Catalog Updated: November  9, 2011 03:34:27 PM
              Enabled: Yes

If you want to configure other repositories (for example local repo), you can follow instructions at this link : http://docs.oracle.com/cd/E23824_01/html/E21802/publisher-config.html

Maybe you will need to install basic XWindow libraries (for example, if you want to export a display to your local X Server). If your repository is configured, you can execute the commands below:

root@S11:~# pkg install SUNWarc SUNWbtool SUNWhea SUNWlibms SUNWmfrun SUNWxorg-client-programs SUNWxorg-clientlibs SUNWxwfsw pkg://solaris/SUNWxwplt truetype/fonts-core
           Packages to install: 65
       Create boot environment: No
Create backup boot environment: No
            Services to change:  5

DOWNLOAD                                PKGS         FILES    XFER (MB)   SPEED
Completed                              65/65     5045/5045    40.9/40.9  280k/s

PHASE                                          ITEMS
Installing new actions                     6797/6797
Updating package state database                 Done
Updating image state                            Done
Creating fast lookup database                   Done

Then logoff and re-login, you can now export your display and launch X Programs:

$ ssh root@192.168.99.130
Last login: Wed Oct 16 14:14:47 2013 from 192.168.99.1
Oracle Corporation      SunOS 5.11      11.1    September 2012
root@S11:~# echo $DISPLAY
localhost:10.0
root@S11:~# xlogo

To conclude this installation, if you want to configure a complete Desktop Manager, you have to install the slim_install package which deploys 315 packages to your system … so it can take a while.

root@S11:~# pkg install slim_install
           Packages to install: 315
       Create boot environment:  No
Create backup boot environment: Yes
            Services to change:  13

DOWNLOAD                                PKGS         FILES    XFER (MB)   SPEED
Completed                            315/315   50633/50633  524.2/524.2  259k/s

PHASE                                          ITEMS
Installing new actions                   81666/81666
Updating package state database                 Done
Updating image state                            Done
Creating fast lookup database                   Done

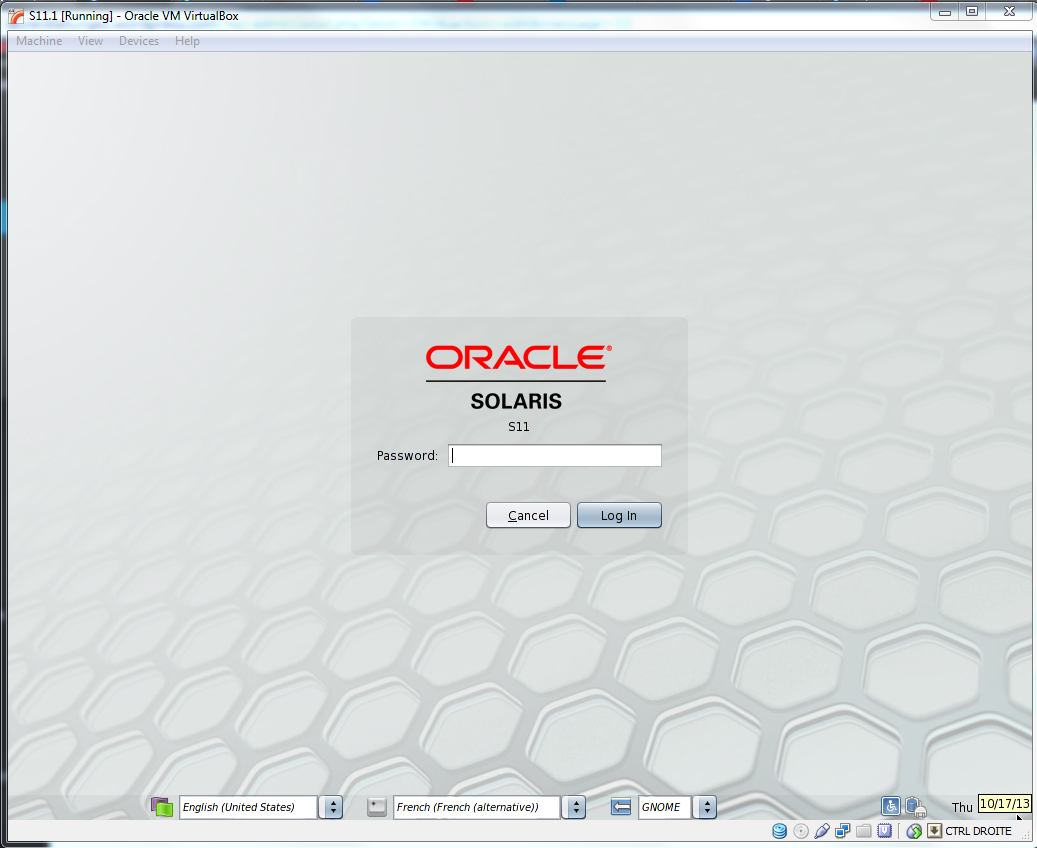
Reboot your machine and you will display a nice Desktop manager environment:

S11_36

This step by step guide is available at this address : http://www.slideshare.net/lolo115/install-solat

Where are X11 libs after a Solaris 11 fresh install

If you already installed Solaris 11 (for example in a Virtual Box VM), you may want to install X11 libs.

To do this, you have to install this bunch of packages:

root@s11:~# pkg install SUNWarc SUNWbtool SUNWhea SUNWlibms SUNWmfrun SUNWxorg-client-programs SUNWxorg-clientlibs SUNWxwfsw pkg://solaris/SUNWxwplt truetype/fonts-core
           Packages to install: 70
       Create boot environment: No
Create backup boot environment: No
            Services to change:  5

DOWNLOAD                                  PKGS       FILES    XFER (MB)
Completed                                70/70   5344/5344    41.2/41.2

PHASE                                        ACTIONS
Install Phase                              7322/7322

PHASE                                          ITEMS
Package State Update Phase                     70/70
Image State Update Phase                         2/2


Create or modify your virtualBox disks to be used in a RAC Cluster

If you want to create a disk to be used in a RAC Cluster, you have to flag your disk to be shared by many virtual machines.

Currently, it is not possible to create a shared disk by using the GUI.So, you must use the VirtualBox command line tool : VBoxManage.

Your disk has be a fixed size disk, and you have to create it first and modify it next to make it shareable.

To create a shared disk, use the createhd command :

VBoxManage createhd --filename /VDisks/asmdisk1.vdi --size 5120 --format VDI --variant Fixed

Next,  use the option –type of the modifyhd command. You can use this command to transform a disk created with the GUI to be shareable.

VBoxManage modifyhd /VDisks/asmdisk1.vdi --type shareable

Now, you can attach your disk to multiple virtual machines and use it as a shared storage device.

Convert a virtualBox disk to plug it into Vmware

Oracle VirtualBox is a powerful virtualization software used on workstation.
The software is fitted with a set of powerful tools that can be used to migrate your disks to VMWare.

If you want to migrate a hard disk initially built with Oracle Virtual Box (VDI) to a VM Ware hard disk. There’s a very easy and it can be done in only two steps:

– first step, you convert the vdi to a raw disk. To do it, you will use “vboxmanage” command from virtualbox

G:\WM_disks> "c:\Program Files\Sun\VirtualBox\vboxmanage" internalcommands \
 converttoraw linux_1_d1.vdi linux_1_d1.raw

– and last step 🙂 you convert the raw disk to a VMDK format disk. In this step, you can still use “vboxmanage” command from virtualbox

G:\WM_disks> "c:\Program Files\Sun\VirtualBox\vboxmanage" convertfromraw `\
linux_1_d1.raw linux_1_d1.vmdk -format VMDK

The conversion is a little bit long and depends on the size of the disk.

To finish, you can add the converted disk to an existing or new VM ware virtual machine.