Oracle provides various SDK to create resources in the OCI.
Recently, I played with the Python SDK for OCI. In this blog post, I will show you the basics to create a simple bucket in the Object Storage part of OCI, and simply put a file on this Bucket.
OCI Client configuration
First, you will need to install the python OCI package. The best for that is to create a python virtual environment, activate it, and install all the packages you need inside.
mbp:python_venv $ python -m virtualenv oci
Using base prefix '/Users/leturgezl/miniconda3/envs/general'
New python executable in /Users/leturgezl/python_venv/oci/bin/python
Installing setuptools, pip, wheel...
done.

mbp:python_venv $ source oci/bin/activate


(oci) mbp:python_venv leturgezl$ pip install oci numpy pandas
Now that packages are installed, we have to configure the client to access OCI.
To do that, we need many things :
- User OCID: this can be found in the User’s Page in OCI
- Tenancy OCI: this can be found in the Tenancy’s page in OCI
- Your OCI region
- A private key file, its public key, and the related fingerprint.
The keys have been generated like this (I used a key without passphrase)
# Private key generation

$ mkdir ~/.oci
$ openssl genrsa -out ~/.oci/oci_api_key.pem 2048
$ chmod go-rwx ~/.oci/oci_api_key.pem

# Public key generation
$ openssl rsa -pubout -in ~/.oci/oci_api_key.pem -out ~/.oci/oci_api_key_public.pem

# Fingerprint generation
$ openssl rsa -pubout -outform DER -in ~/.oci/oci_api_key.pem | openssl md5 -c
Once you did that, you will have to configure you user in OCI to add it the public key, the fingerprint given in the interface must match with the previous command:
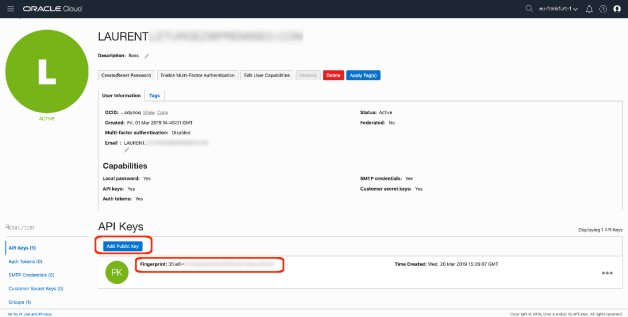
It’s important to keep your private key “private” (don’t send it to another people, or leave it without any protection on your laptop).
Now, your local environment is configured, we will need a dictionary structure in our python script to use the SDK.
This dictionary can be build manually and embedded in the code, then you will have to fill the required fields (Key file location is the private key location):
config = {
    "user": "ocid1.user.oc1..aaaaaaaamcel7xygkvhe....aaaaaaaaaaaaaaaaaaaaa" ,
    "key_file": "~/.oci/oci_api_key.pem",
    "fingerprint": "35:aa:aa:aa:aa:aa:aa:aa:aa:aa:aa:aa:aa:aa:aa:aa",
    "tenancy": "ocid1.tenancy.oc1..aaaaaaaahgagkf7xygkvhe....aaaaaaaaaaaaaaaaaaaaa",
    "region": "eu-frankfurt-1"
}
Or, you can configure a local “config” file in your ~/.oci/ directory and then load it in the code with the given python code below:
$ cat ~/.oci/config
[DEFAULT]
user=ocid1.user.oc1..aaaaaaaamcel7xygkvhe....aaaaaaaaaaaaaaaaaaaaa
fingerprint=35:aa:aa:aa:aa:aa:aa:aa:aa:aa:aa:aa:aa:aa:aa:aa
key_file=~/.oci/oci_api_key.pem
tenancy=ocid1.tenancy.oc1..aaaaaaaahgagkf7xygkvhe....aaaaaaaaaaaaaaaaaaaaa
region=eu-frankfurt-1
Note : you can embed more than one user profile in this file. The only one required is the DEFAULT profile.
>>> import oci
>>> import pandas as pd
>>> config=oci.config.from_file()
>>> df=pd.DataFrame.from_dict(config, orient='index')
>>> df
                                                                       0
log_requests                                                       False
additional_user_agent
pass_phrase                                                         None
user                             ocid1.user.oc1..aaaaaaaamcel7xygkvhe...
fingerprint              35:aa:aa:aa:aa:aa:aa:aa:aa:aa:aa:aa:aa:aa:aa:aa
key_file                                          ~/.oci/oci_api_key.pem
tenancy                     ocid1.tenancy.oc1..aaaaaaaahgagkf7xygkvhe...
region                                                    eu-frankfurt-1
You can read the oci config file and select another profile by using this:
config = oci.config.from_file(profile_name="laurent")
Or use another file by using this parameter
config = oci.config.from_file(file_location="~/OCI_config.uat")
You can see there are more parameters in the dictionary, you can find the details by reading this: https://docs.cloud.oracle.com/iaas/Content/API/Concepts/sdkconfig.htm.
Creating an Object Storage bucket in OCI
Now our client is well configured to access OCI through a user and his keys.
it’s really easy to create a bucket. We have to request an ObjectStorageClient object and use it to create the bucket:
import oci
from oci.object_storage.models import CreateBucketDetails

compartment_id = config["tenancy"]
object_storage = oci.object_storage.ObjectStorageClient(config)

namespace = object_storage.get_namespace().data
bkt_name = "python-bucket"
object_name = "python_file"

print("Creating a new bucket {!r} in compartment {!r}".format(bkt_name, compartment_id))
request = CreateBucketDetails()
request.compartment_id = compartment_id
request.name = bkt_name
bucket = object_storage.create_bucket(namespace, request)
This will produce that kind of output:
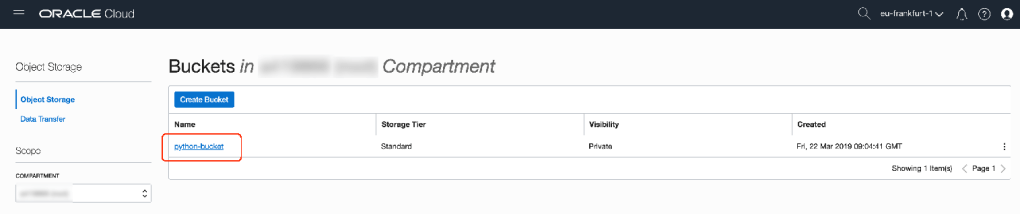
Creating a new bucket 'python-bucket' in compartment 'ocid1.tenancy.oc1..aaaaaaaahgagkf7xygkvhe...'
And in the OCI web interface, our bucket appeared :
Put a file into the Object storage bucket
Now we have a bucket created in our compartment, it’s easy to put a file on it (I’ll put a binary file which is a PNG file).
To do that, the below code will be enough (considering variables have been initiated by previous code parts … see above)
with open("images/myimage.png", mode='rb') as file:
my_data = file.read()

obj = object_storage.put_object(
namespace,
bkt_name,
object_name,
my_data)
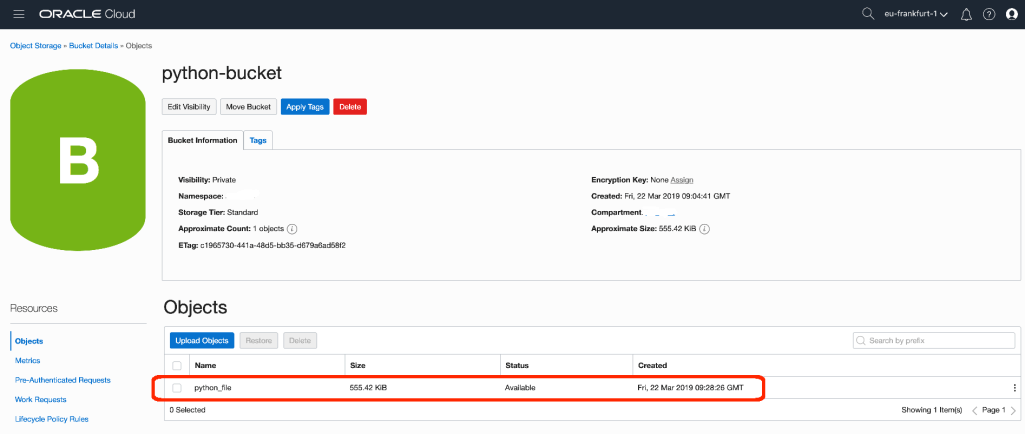
In the OCI console, inside the previously created bucket, the file has been created and is available:
As you can see, deploying resources on the OCI is easy and you can deploy your full infrastructure with a bunch of code.
Next investigations will be made soon, specially to deploy virtual machines, storage and databases of course.
That’s it for today 🙂